


Hi!
I'm getting nuts here and guess I'm maybe missing one part. How die these parts fit together to built to horizontal holder needed for this sensor ?
Thanks for any advice !
Cheers
Peter

 Neuer Benutzer

Hi!
I'm getting nuts here and guess I'm maybe missing one part. How die these parts fit together to built to horizontal holder needed for this sensor ?
Thanks for any advice !
Cheers
Peter
 GHL Support Team

Hi,
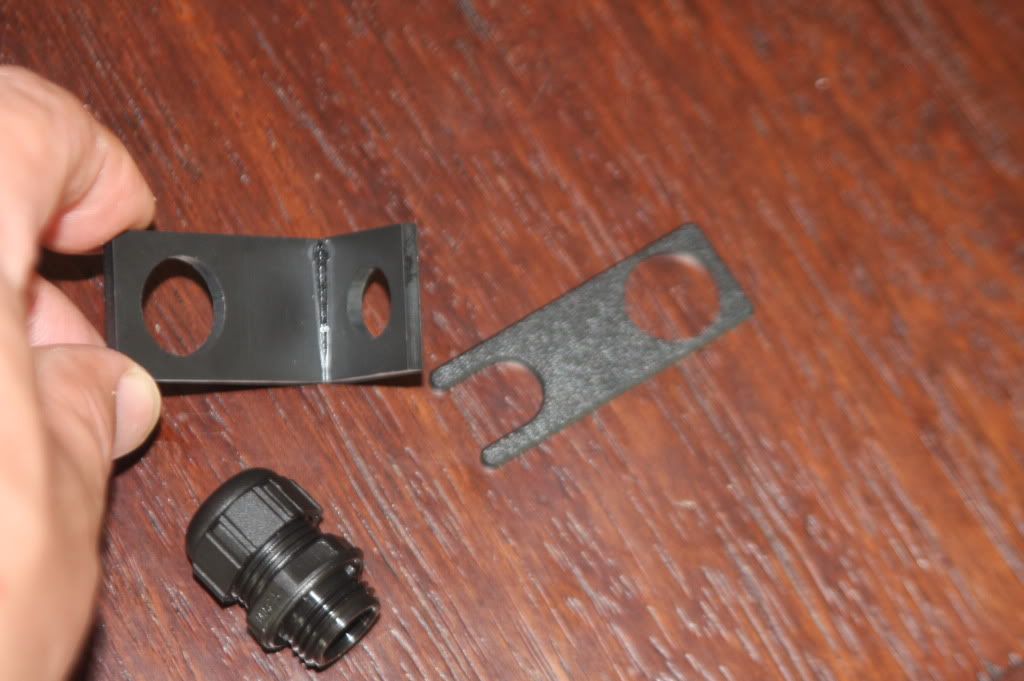
this picture shows how to assemble it:
if the sensor should be mounted horizontally then the angled bracked has to be used rather than the flat plate.
Benutzer
Have been trying to fugure this out for months and i just gave up.....
I am sure there must be one plastic pulley missing from the kit or i'm very very stupid ..... there is no way you can fasten that angled kit you bought on the base unit....... unless you have a plastic pulley to fasten the third piece you show in the picture to the angled piece and have the optical level sensor ( the version with the black nose ) horizontally.....
i have made my own angled sensor using the provided parts from the base unit and the angled kit i bought but it is nowhere near as the picture Mattias posted.....
if you want i can take a picture of my setup
cheers
christos
Neuer Benutzer
Christos,
actually it is rather easy after I received a key information:
You use either the part with the angel OR the other part !
In my case the additional problem was that one nut was missing. GHL sent it to me even free of charge - very nice !
Benutzer
You are right !! i figured it out that one.... the thing is that in order to fasten the angled bracket Or the straight one you still need a plastic pulley to tighten it to the gland ... the top part of the gland tightens to the plexiglass tube and the bottom pulley - that is missing ----tightens the angled piece.....my kit did not have any ( and i have ordered 2 of these kits just to be sure that i was going to assemble it right ) ..... another thing is that the hole of the angled piece is a bit small and cannot fit into the gland.... i iused a small file to open the hole a bit in order to prevent damaging the threads of the gland...
if one is missing this plastic pulley there are plenty of them at electric supply stores
cheers
Christos
Neuer Benutzer
Christos,
one ore thing I found our trying is that one of the nuts you need is already mounted on the sensor ! So use that one to fix the sensor to the bracket and the big nut to mount the bracket to the holder on the plexi tube.
I really don't understand why a simple explosion view is not add to the packaging - would make user so much more happy and such a cheap quick win for GHL
Cheers
Peter
 Erfahrener Benutzer
Attachment 2095
This is how I have it attached to the overflow. In my case I am using it as a sensor just in case overflow level goes up.
I just posted another pic on another thread here of the bottom part of the sensor/bracket.
Hope that helps.
It was NOT an easy task to assemble it so don't feel bad. Ask away.
Erfahrener Benutzer

Yeah I was kind of thinking I was a total douche!
This is how I have it now but the top looks different to yours. are you mounting it differently?
DSC_0497.jpgDSC_0500.jpg
Erfahrener Benutzer
I think the bottom bracket that holds the sensor you need to mount it the other way around. Look at my pic and see that I have the sensor "under" the black plastic cover. Kimd of like a "little roof" overthrow sensor. I believe that's to keep water from accumulating on top and to have water flow toward the sides.
But I am sure the gurus will input here to correct me if I am wrong.
Erfahrener Benutzer
Oh i see what you mean
Ill change that now
Thanks man!
 Posting Permissions

 Reply With Quote
Bookmarks